Parking sensor progress
A few months ago, I was working on a parking sensor. The project is still ongoing, its slowly progressing. Last post, I was using a single sensor which measured a distance, and that was visualised on the display. I have since scaled this up to use three sensors. however this came with an unexpected footgun.
Each sensors has a small daughterboard which contains all the hardware that can translate the sensor’s output into a signal that can easily be used by a microcontroller. However this also means that each sensor has its own internal clock. I each sensor set to ‘Automatic’ mode which means that they measure and transmit the distance every 120ms. I soon found out that the clocks of the sensors were not synchronised and that ultrasonic based measuring methods fail when multiple sensors are measuring at the same time. In reality this meant that the system quickly broke down when multiple sensors were added. The obvious solution was simple, synchronizing the sensors. If the sensors are synchronised, they will never see each other’s sounds as their own. Unfortunately synchronising the clocks means an additional connection to the sensor’s RX pin was required, and my PCB did not have such connection. I ended up ordering a new set of PCBs with the required connection.
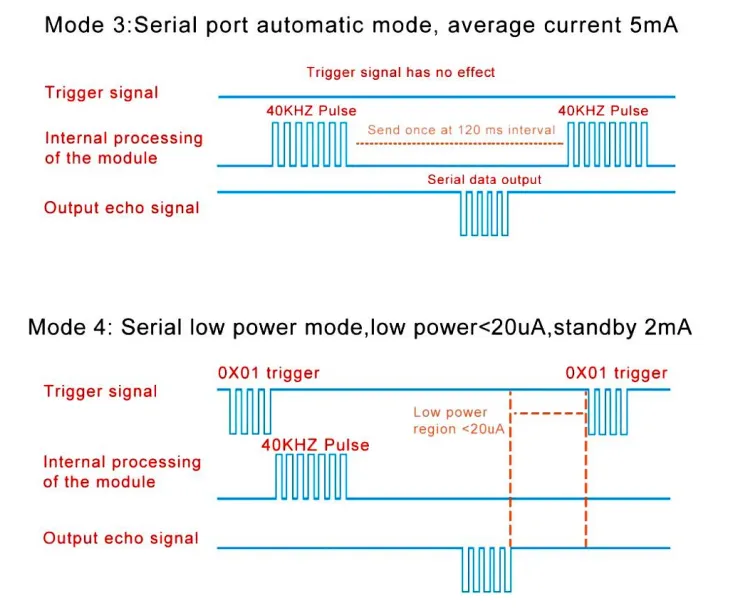
As can be seen in the image above, a small serial message (0x01) is all that is needed to trigger the sensor, it will then execute a measurement and return the result after a short while. The ESP32 based display will use I2C to communicate with the ATtiny404’s which act as a buffer between the display and the sensors.
twi.SetAddress(1)->AttachInterrupt([](uint8_t index) {
switch (index) {
case 0:
return (uint8_t)distance;
case 1:
uart.Transmit(1);
return (uint8_t)(distance >> 8);
default:
break;
}
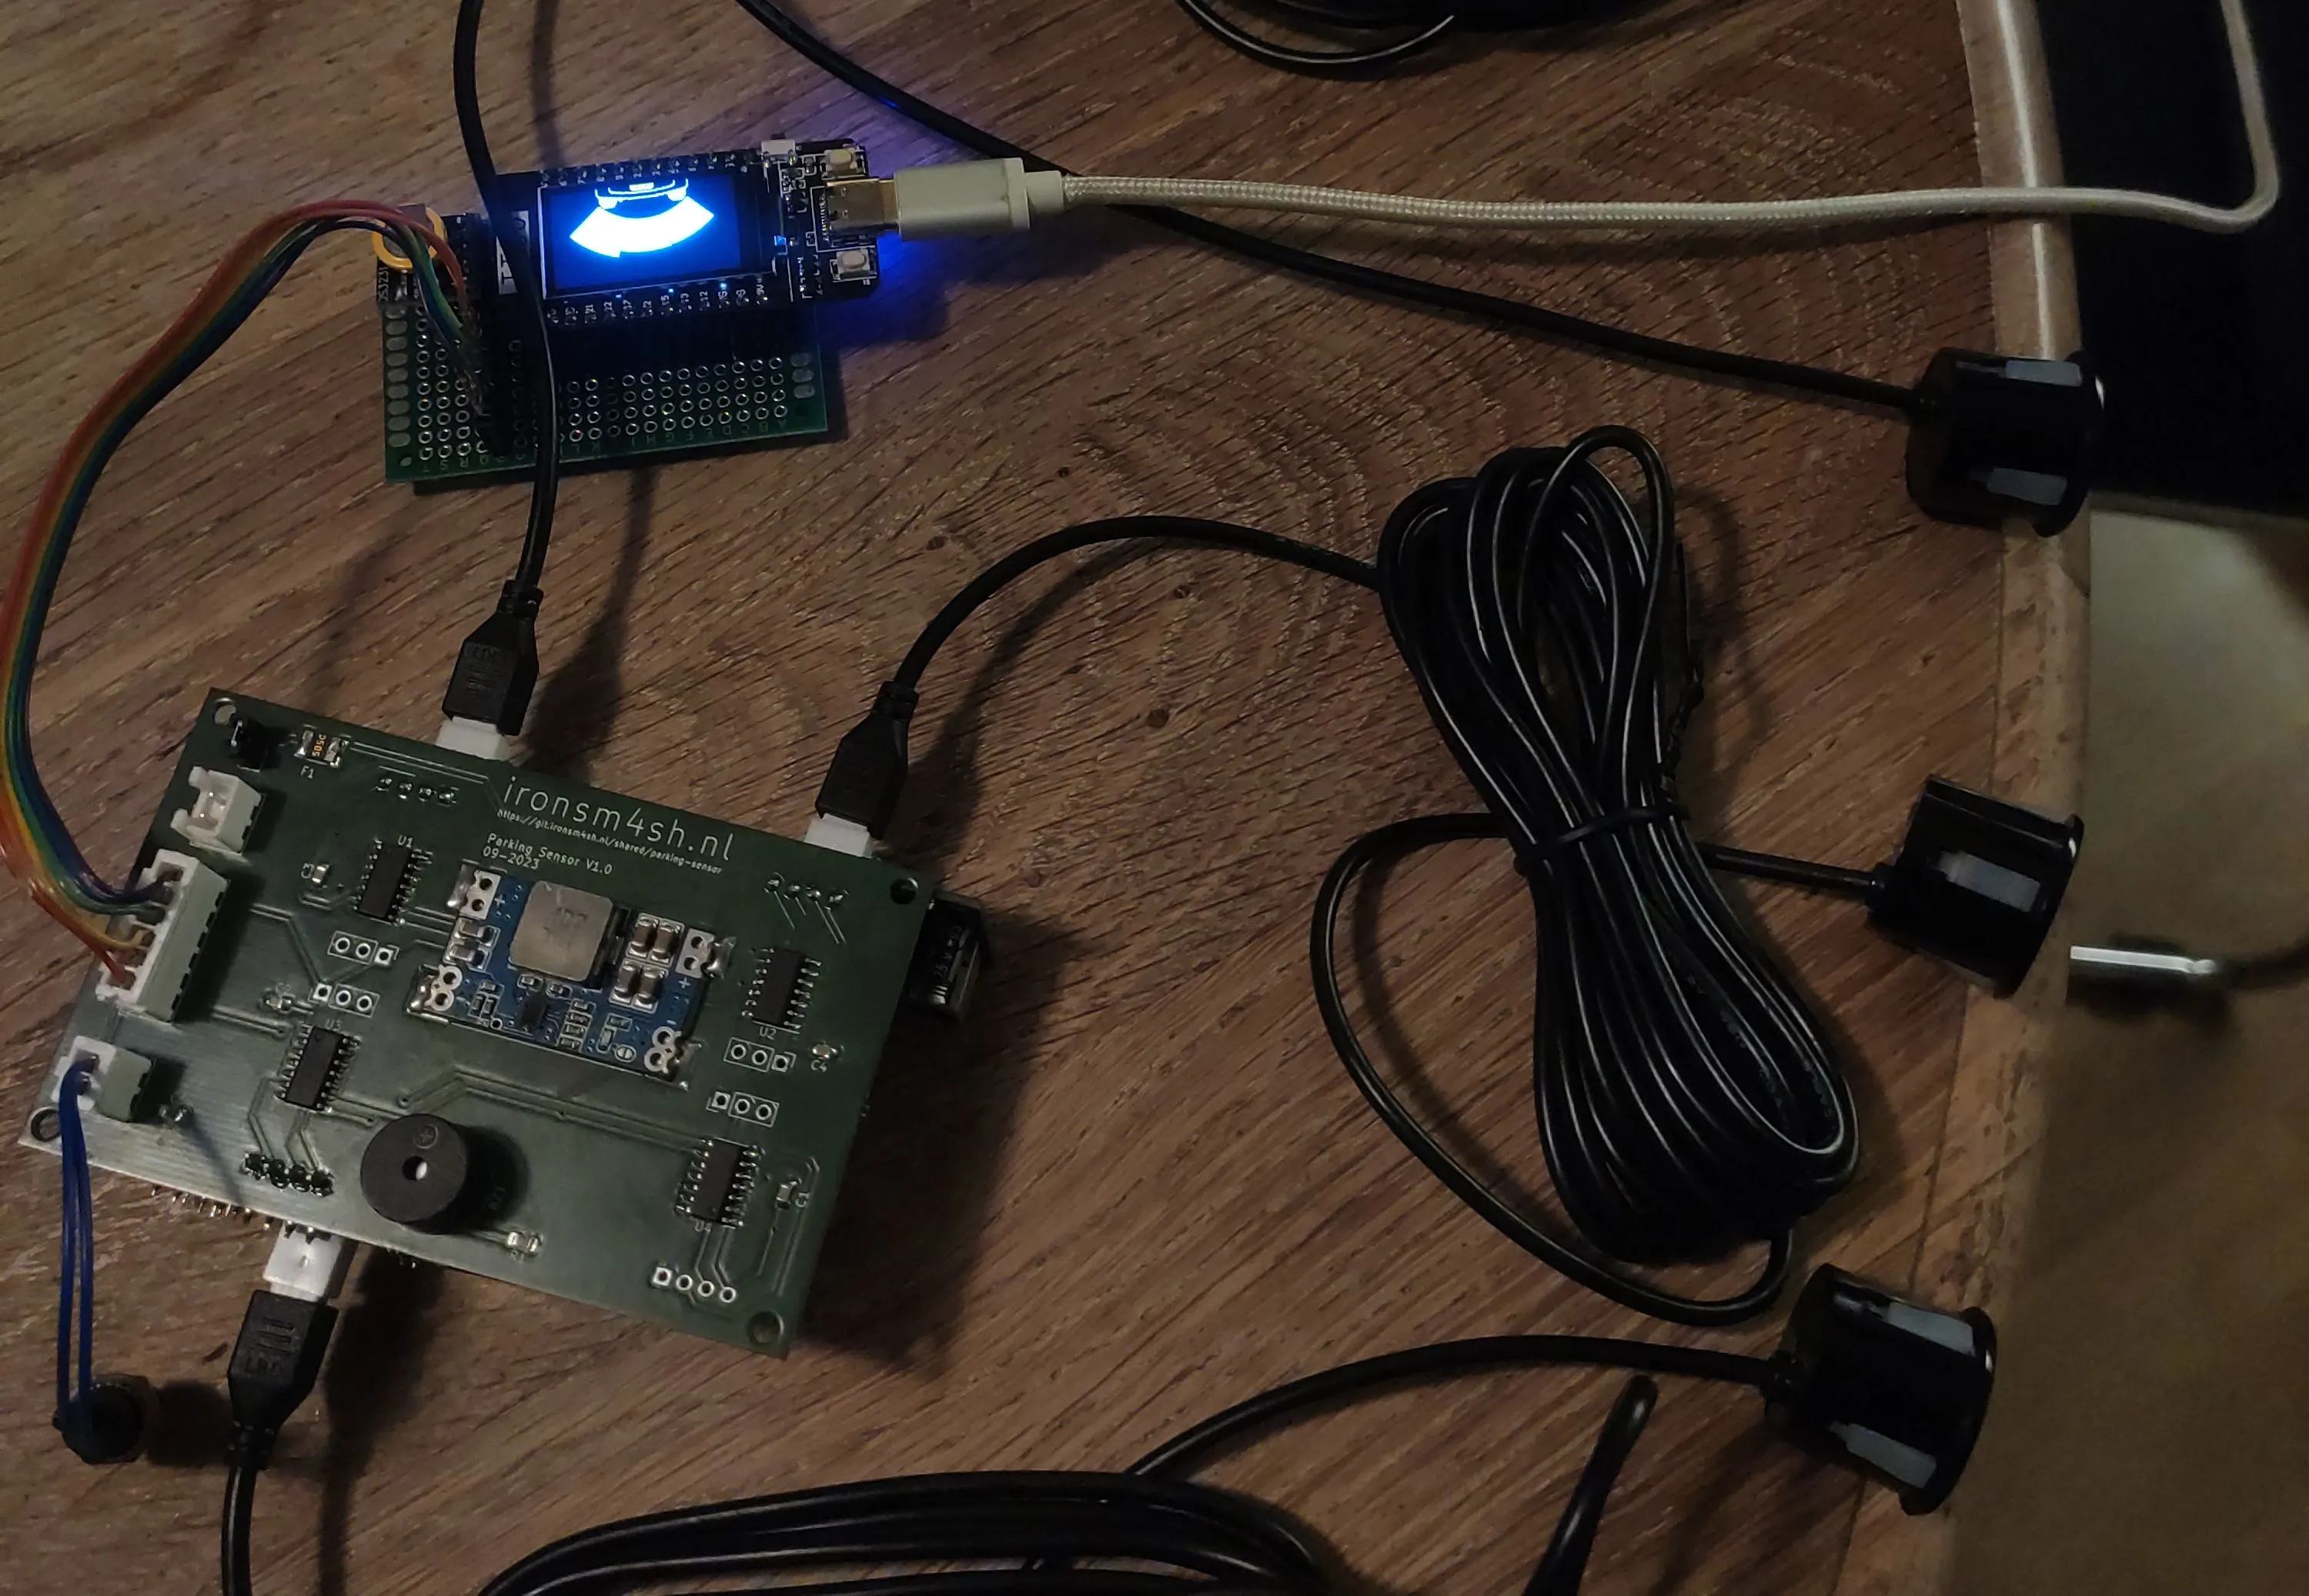
});Sending this pulse every time the ESP32 is communicating with the ATtiny404 means that the sensors are synchronised, and it also means that there is no more crosstalk between the ultrasonic distance sensors. In the image below, three sensors are connected without any problem and their status is visualised on the display.

At this point, there are only a few tasks left before this project is finished;
- Increase the visualisation of the sensor, currently their outputs are being shown without any smoothing, which can be confusing.
- Find a way to mount it all in my Ford Ka.
- Increase the reliability of the button which isn’t properly debounced at the moment.
If you spot any mistakes or if you would like to contact me, visit the contact page for more details.