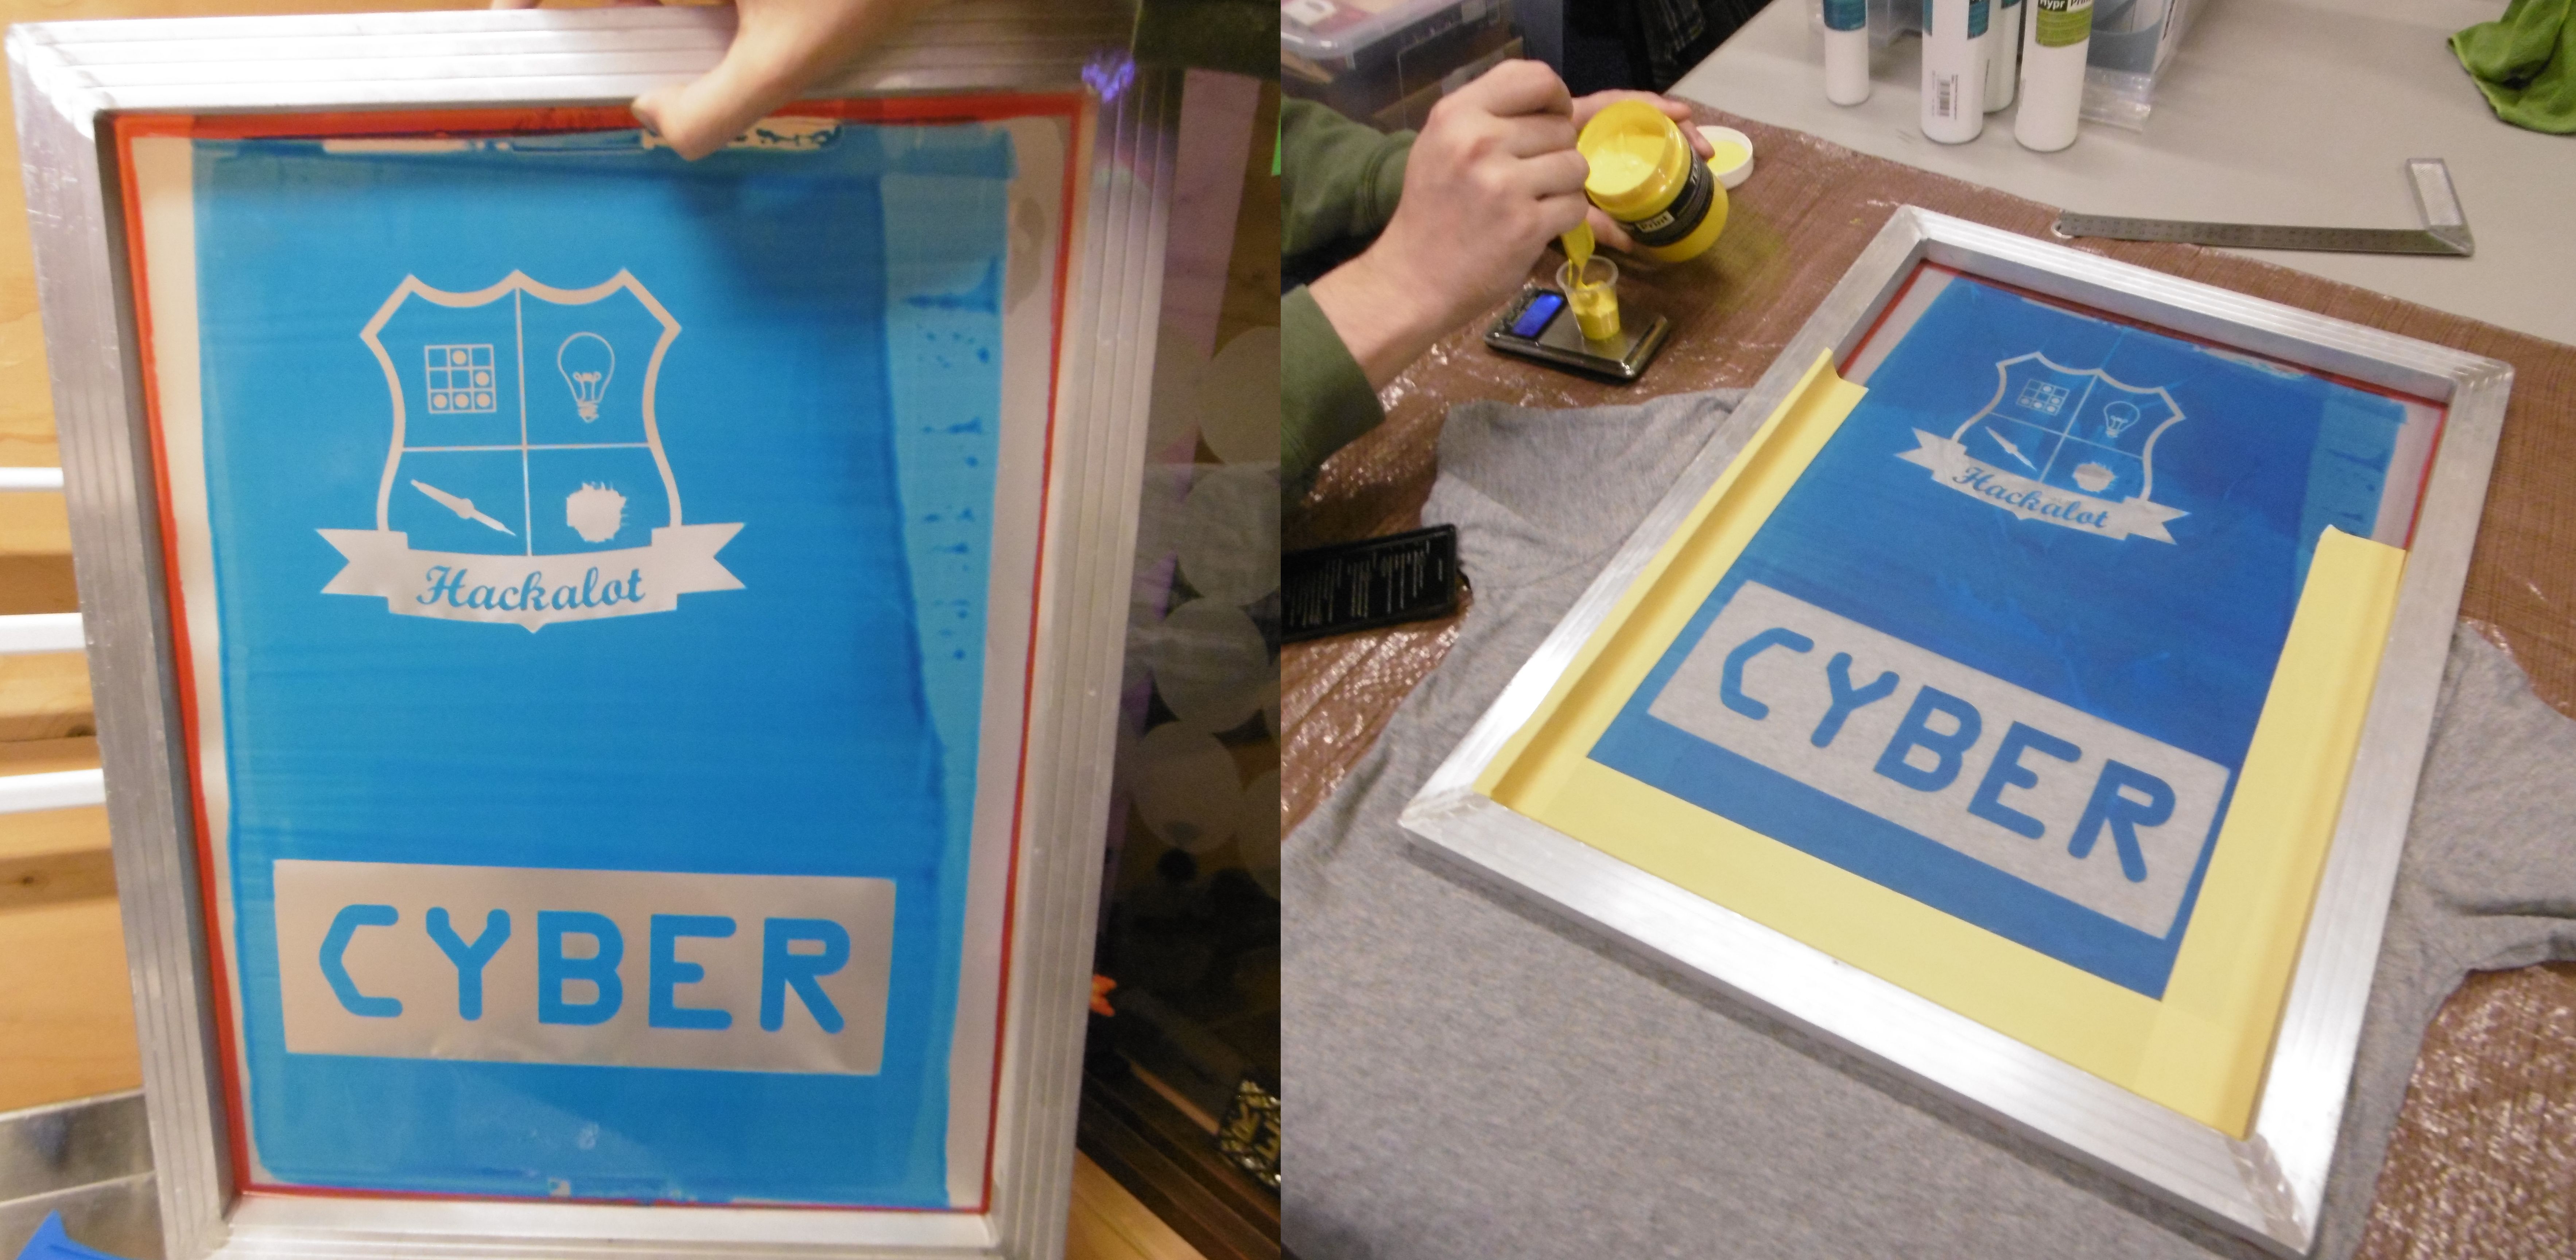
Screenprinting
We recently bought a screenprinting kit at my local hackerspace. This kit consists of a mesh screen, clear printable films, screenprinting dye, screenprinting photoresist, a squeegee and a powerful light. This kit makes it possible to print custom designs on fabric, like shirts. The process is very similar to making circuit boards. Because the kit was bought by a group of people, we decided that it would be a fun opportunity for a screenprinting workshop.

workshop
The workshop is very simple, we wanted each participant to be able to go through the process of screenprinting something on a sock (or other similarly small fabric item). Participants create designs on their computer, and then print it on clear film. We have prepared small A6 screen printing frames, which are already coated with photoresist. The participants use the clear film to expose the A6 frame, wash the un-exposed photoresist away, and they’re ready to print their own design in one of the activailable colours.
Creating small A6 frames
The kit only shipped with a single, large A3 frame. This allows you to print large designs, but it also requires a lot of photoresist to fully cover. It also makes it a lot harder to create a workshop because that would require each participant to progress at the same pace. But most of all, a large frame is simply a lot less cute. That is why we decided to create several small frames, A6 size. The frames are made using lasercut wood. We had a few issues while trying attach the screen (while being under tension), we tried several different methods, using all kinds of clamps and but in the end an embroidery frame worked the best.

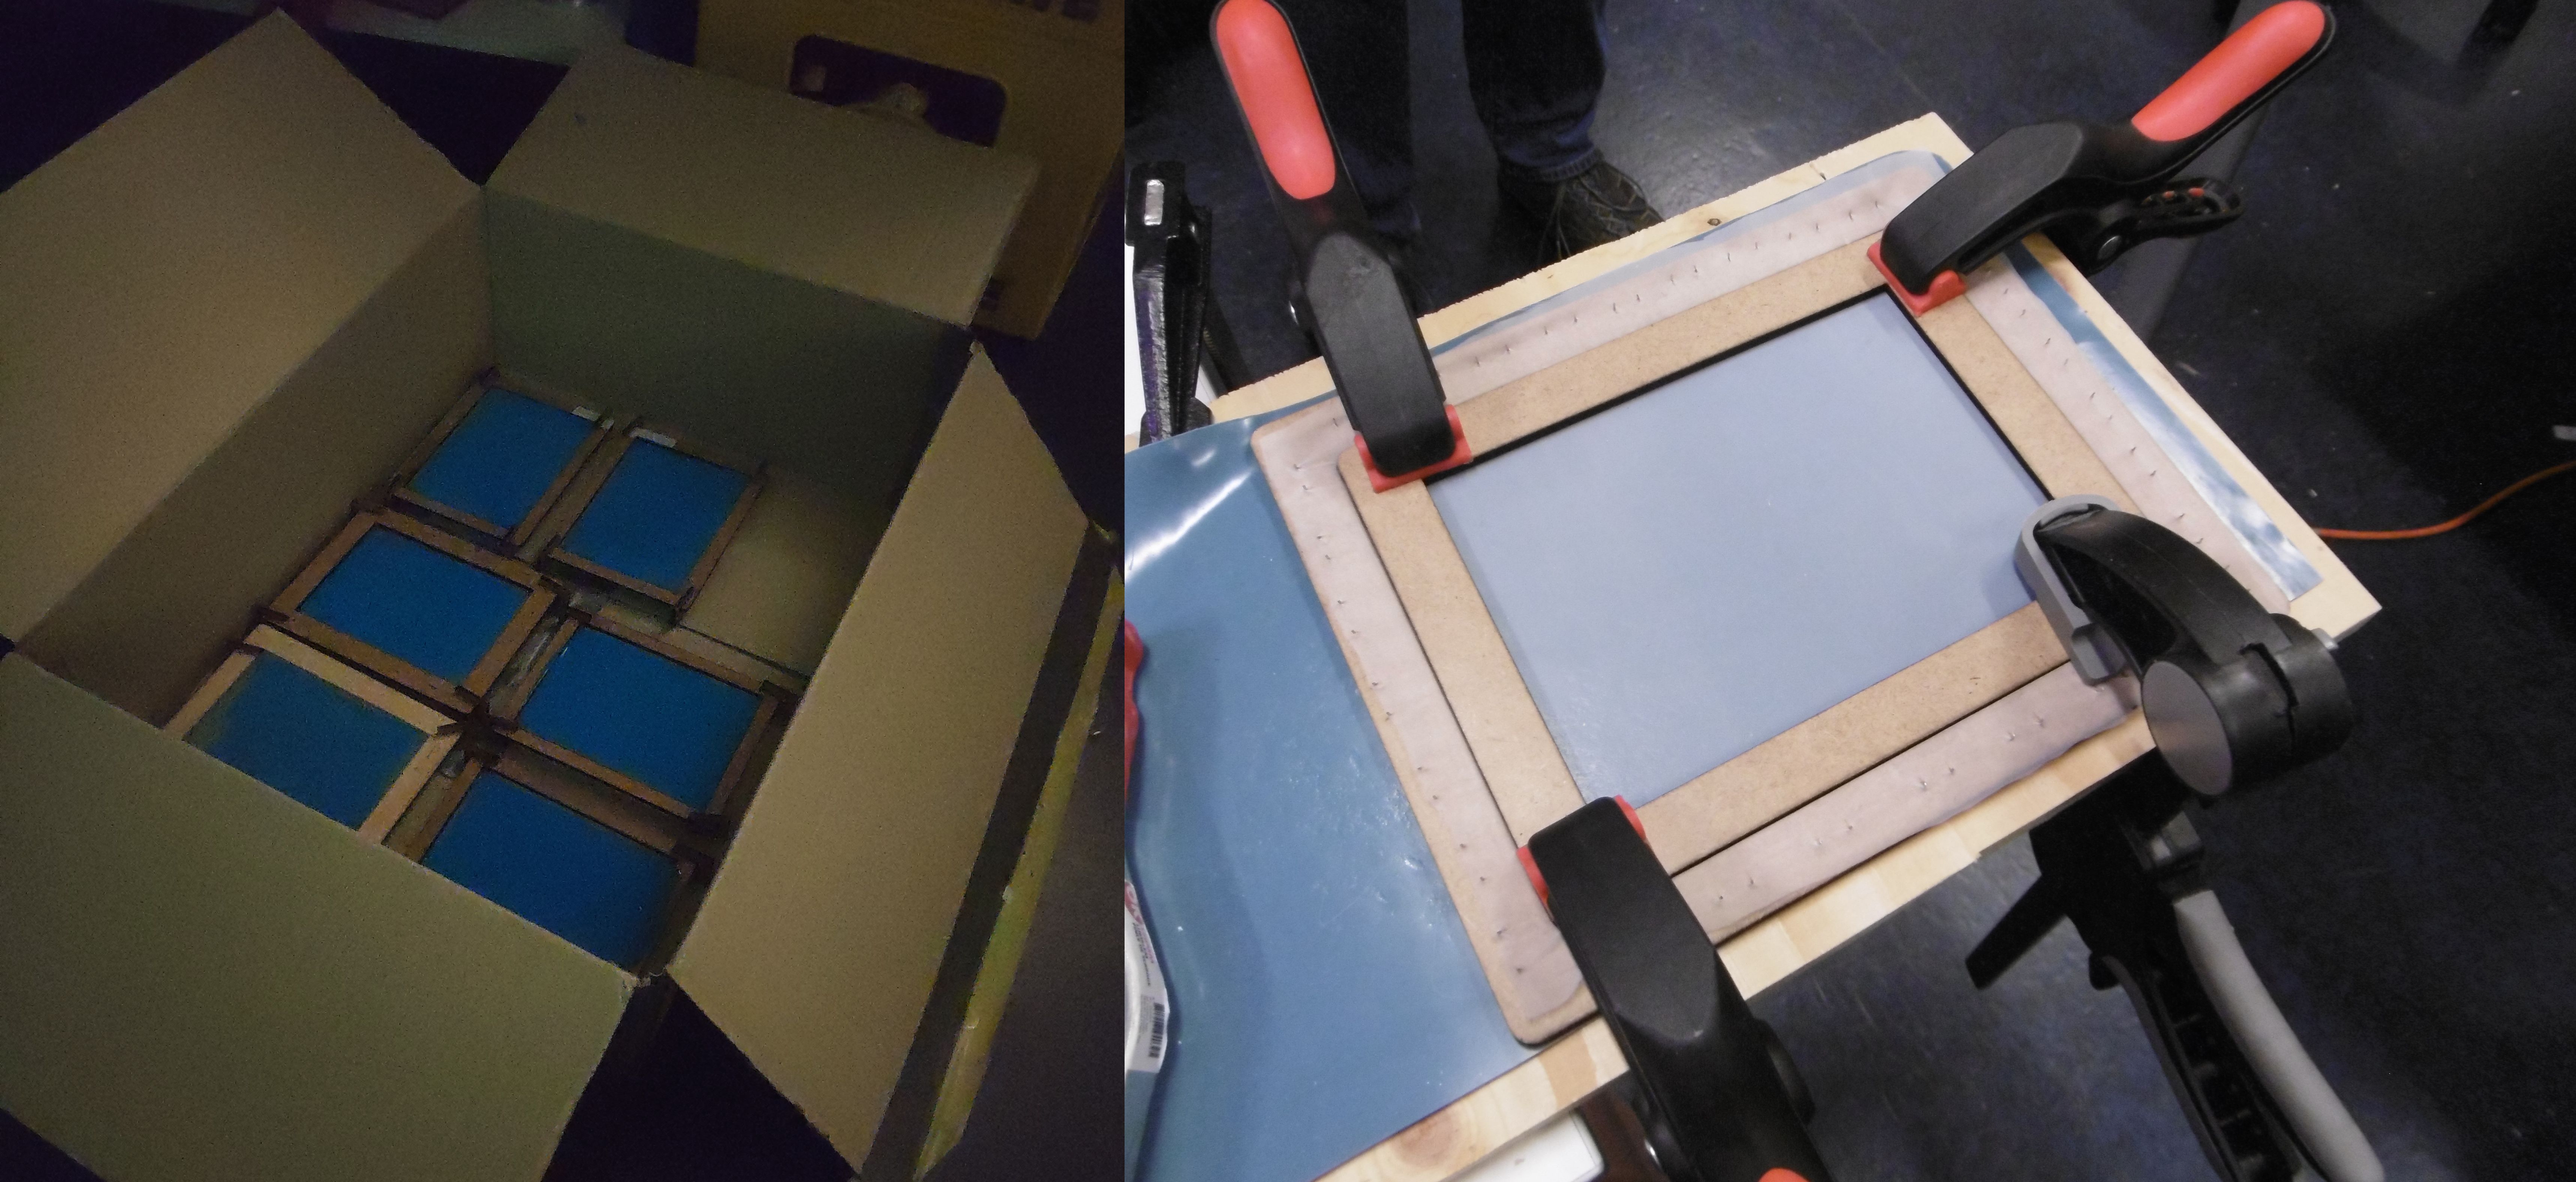
When a screen is coated with photoresist, it should be left to dry for a while (at least 6 hours) before being exposed.
Using a small A6 frame
When a screen is coated, using it is fairly straight forward, simply print your design on a clear film, expose the photoresist, wash the unexposed photoresist away and you’re ready for printing.

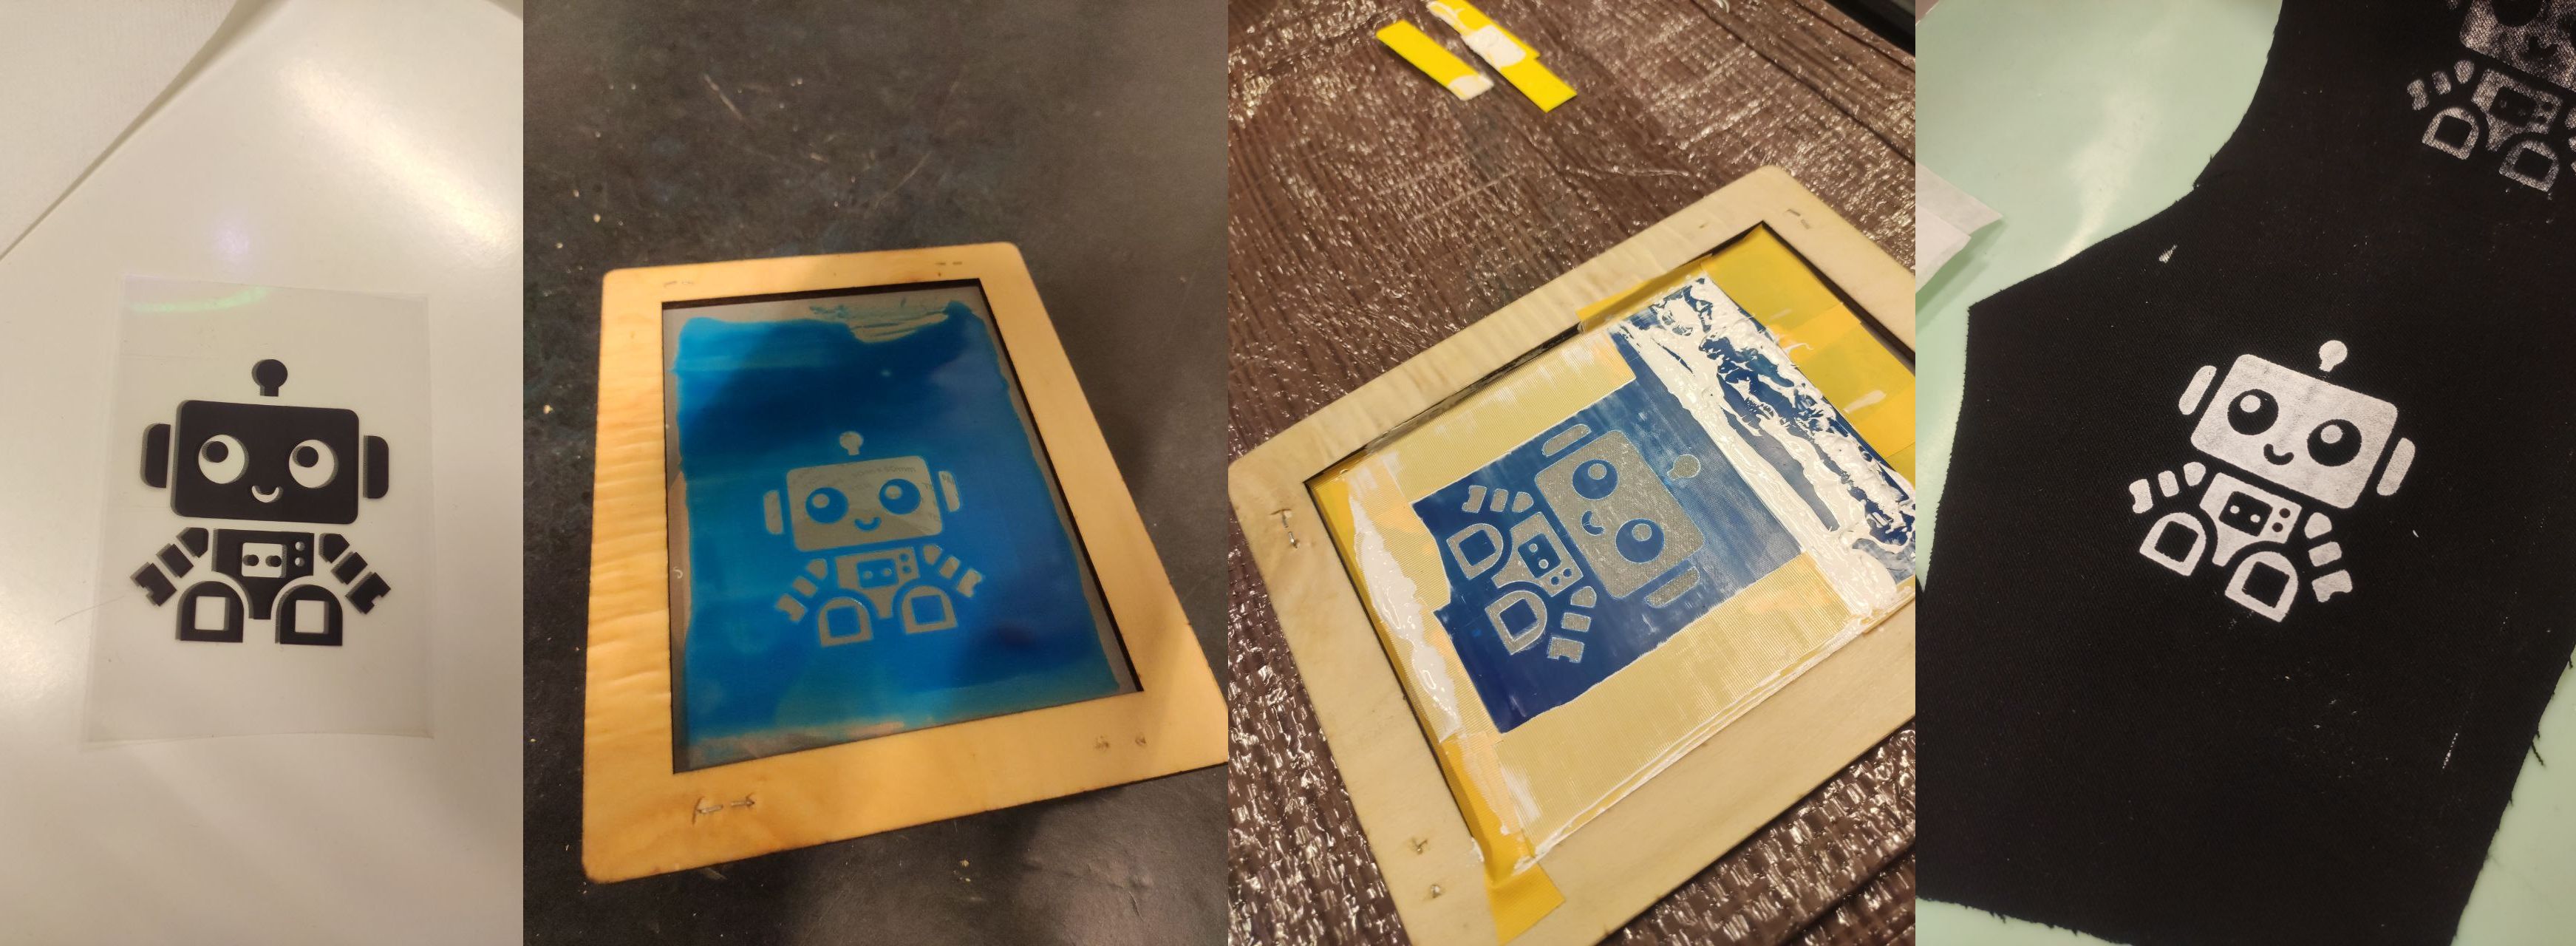
After printing is important to heat to ink to make it permanent, a simple hair dryer and iron will work.
Thank you for reading this article.If you spot any mistakes or if you would like to contact me, visit the contact page for more details.