Signed Distance Function
Recently, a friend of me showed me a new feature in a project that she was working on. Its a library that can easily created styled outputs in the terminal. If you are curious about this library, it is available on gitlab. The new feature allowed the library consumer to show heightmaps to the user. An example of this can be seen below:
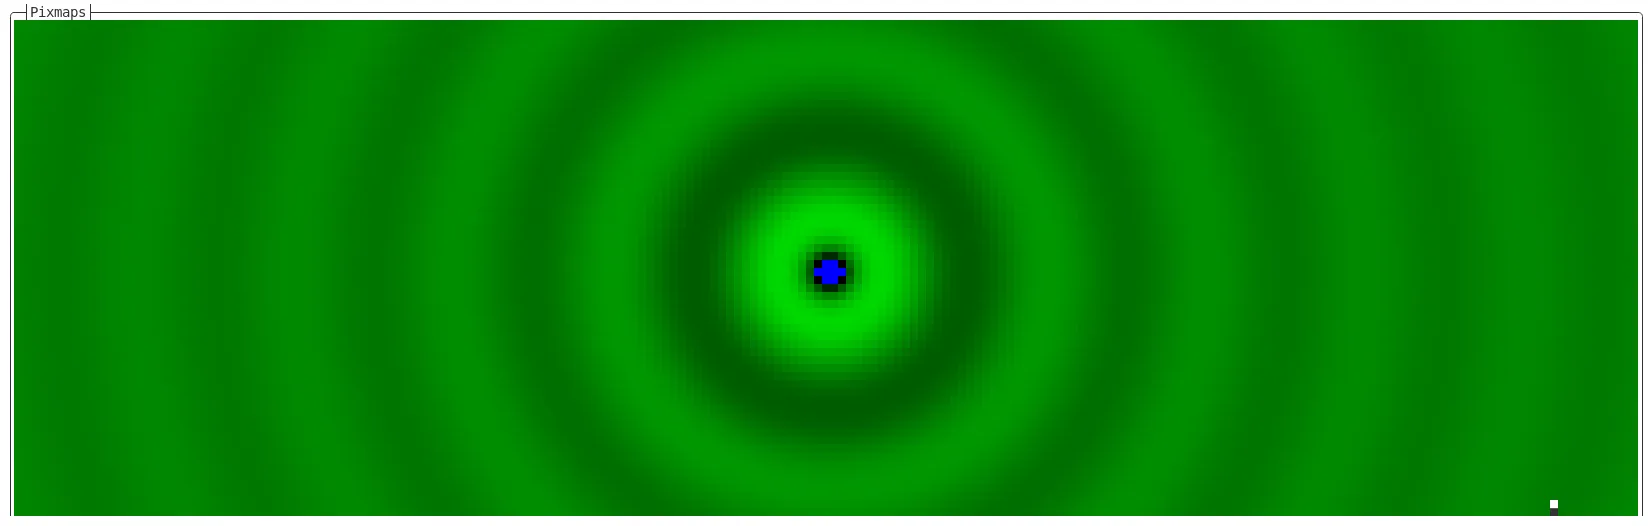
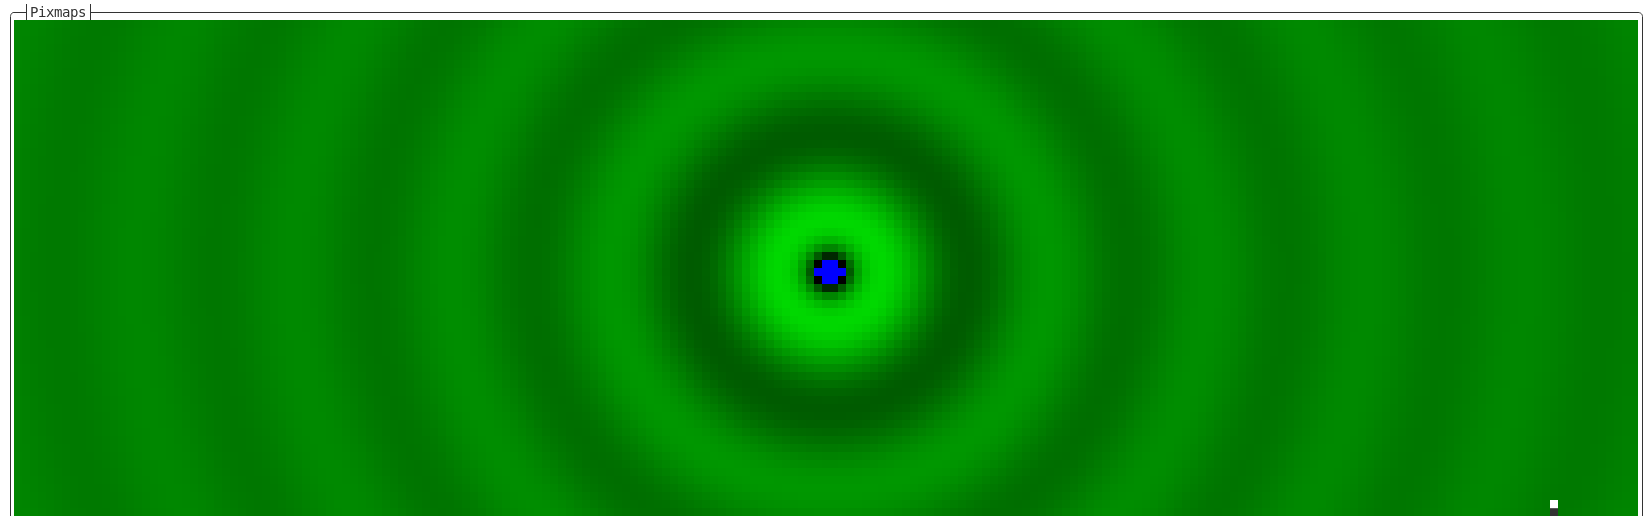
This functionality works through a loop which runs for each pixel, where the library consumer can define a function which returns the height at that point. The calculated values will be visualised in the terminal. The code below shows how this can be used to trivially show a representation of a 2D sine wave:
void print_pixmaps() {
    auto box = boxer::box{"Pixmaps"};
    boxer::print_pixmaps(box, [](boxer::coordinate c) {
        // Runs for each pixel, z being time.
        const auto x = static_cast<double>(c.x);
        const auto y = static_cast<double>(c.y);
        const auto z = static_cast<double>(c.z);
        return (3 + std::sin(x / 10.0) + std::sin(y / 10.0) + std::sin(z / 10)) /
                6.0;
    },
    boxer::normal_float_to_height_color, 0, 120, 200);
}
However, when I see this, my mind starts screaming shader! shader! shader! internally, and it is only a matter of time before there is a 3D spinning donut. This is a reference to Donut-shaped C code that generates a 3D spinning donut. My website was an ASCII 3D spinning donut for quite some time, a representation can be seen below.
Creating a 3D scene in a shader is suprisingly simple. When tracing a ray, you test for intersections. There are multiple ways to test for intersections, two common ways are:
- The fastest way is using algebra to find intersections with a line. In that method, all objects in the scene are described as functions that can test collision between the “object” and the ray cast from the camera. The drawback is that its hard to create the desired shapes because you can’t easily perform boolean operations on shapes.
- A fast middle ground is using ray marching in which all objects are described using a series of SDF’s that can test the distance between a point and the surface of an object. This is often fast enough, and it allows for boolean operations, which makes it easy to create many shapes.
All you need to start ray marching is a function that returns the distance from a given point to the nearest surface. This function is called a SDF (=Signed distance function). Using an SDF, implementing a ray marching algorithm is only a few lines of code. An example of the SDF for a sphere is:
constexpr double sphere_sdf(double x, double y, double z) {
    const double radius = 0.8;
    return std::sqrt(x * x + y * y + z * z); - radius;
};
This function can calculate the distance to the surface of the sphere for any given point. If the point lies within the sphere, the distance returned will be negative. Using an SDF to write a raymarcher is very simple (if you have done any kind of graphics programming before!).
constexpr double to_d(std::size_t n) { return static_cast<double>(n); }

constexpr auto distance(std::floating_point auto... x_i) {
    return std::sqrt(((x_i * x_i) + ...));
}

constexpr double distance_to_torus(double x, double y, double z) {
    const double outer_radius = 0.4;
    const double thickness = 0.3;

    const double xy_d = distance(x, y) - outer_radius;
    const double d = distance(xy_d, z);
    return d - thickness / 2;
};

void print_pixmaps() {
    auto box = boxer::box{"Pixmaps"};
    boxer::print_pixmaps( box, [](boxer::coordinate c) {
        // Resize the canvas
        const auto x = (to_d(c.x) - to_d(c.x_max) / 2.0) * 0.025;
        const auto y = (to_d(c.y) - to_d(c.y_max) / 2.0) * 0.025;

        double z = -10.0;
        for (uint32_t i = 0; i < max_steps; ++i) {
            // Get the distance to the surface
            double d = distance_to_torus(x, y, z);

            // If we got very close, consider it a hit, otherwise take a step.
            if (d <= 0.01) {
                return 1.0;
            } else {
                z += d;
            }
        }
        return 0.0;
    },
    boxer::normal_float_to_height_color, 0, 120, 200);
}
And that is all you need, a fully functional raymarcher! Ofcouse, the output is currently binary, as the normals are not calculated, so the image won’t look very pretty. Luckily for us, calculating the normals can be very easy, if we cheat. By moving very small distances from the position of out final hit, and getting the difference of the distance to the surface, we can derive the slope of the point of contact. This looks as follows if implemented in C++.
constexpr double ε = 0.001;

double normal_x = distance_function(x + ε, y, z) -
                  distance_function(x - ε, y, z);
double normal_y = distance_function(x, y + ε, z) -
                  distance_function(x, y - ε, z);
double normal_z = distance_function(x, y, z + ε) -
                  distance_function(x, y, z - ε);

double inverse_norm = 1.0 / distance(normal_x, normal_y, normal_z);
normal_x *= inverse_norm;
normal_y *= inverse_norm;
normal_z *= inverse_norm;
Then simply change the output to shade based on the normals, and voilà! a ray marched 3D spinning donut in the terminal. (Death star added outside this article)
Thank you for reading this article.If you spot any mistakes or if you would like to contact me, visit the contact page for more details.